|
|
|
Typical D30
& D60 pictures tend to be a little "off" on
certain colors. In most cases, the casual
observer won't even notice a problem. But it can
drive perfectionists (and critics)
crazy. Yes, these
things did drive me crazy... so much that I
spent countless hours tinkering around with
various combinations of software tweaks, and
eventually came up with a simple fix to put
everything back into balance. The best
fix requires Adobe PhotoShop (full version). And
with the full version, you can create a hot-key
"action" to make the correction a single push
button event. For those who
don't have the full version of PhotoShop,
scroll down the page and you'll find an
alternate method you can use in PhotoShop LE.
You can't create an "action" with PhotoShop LE,
so you'll have to do it manually, step by step,
for every picture that needs
attention. If you don't
have the full version, I strongly recommend
buying it. Think about it this way... with a D30
(or any other serious digital camera),
your investment certainly justifies having the
best software to make your pictures the best
that they can be. Once you learn how to use it,
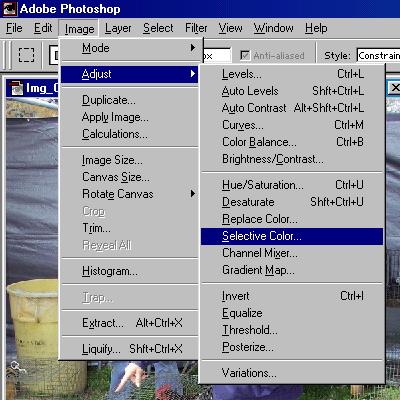
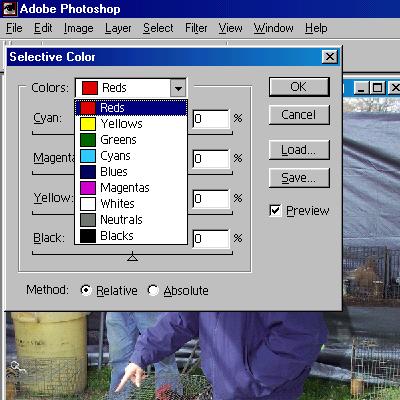
you won't regret the investment. Here's the
Photoshop fix Screenshots
from Adobe PhotoShop version
6.1 (You'll
only be using the Reds and the
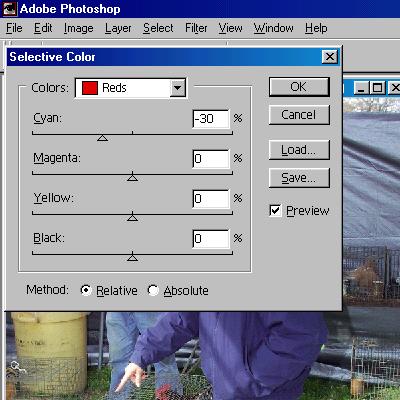
Cyans.) Enter
"minus thirty" in the Cyan
field.* *It's
easier to type the number value in the
box than it is to tediously slide the
arrow to a specific point. Enter
"minus thity" in the Magenta
field. That's
it. Now
click on "OK". Watch
the changes... the effect is
immediate.
Done. This
pretty much takes care of every problem
listed in the opening
paragraph. (Your
mileage may vary.) Before & after samples
of the Photoshop (full version)
correction
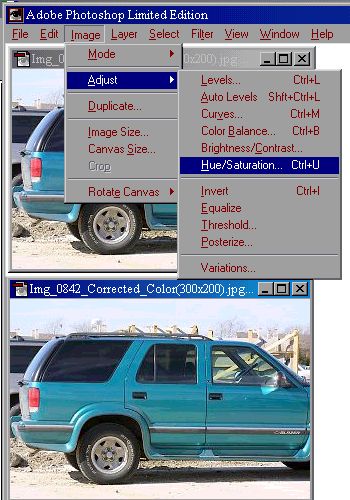
Here's the
PhotoShop "LE" fix Screenshots
from Adobe PhotoShop
LE *
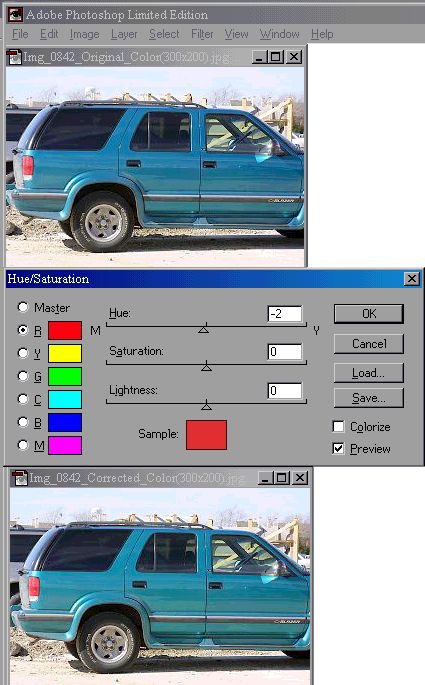
Note: Enter
"minus two" in the Hue
field.* *It's
easier to type the number value in the
box than it is to tediously slide the
arrow to a specific point. Not
much difference can be seen yet. The
only thing affected in this picture is
a very minor change in the taillight
redness. A
significant change will be seen in
pictures with more reds, and / or if
there are greenish skin tones
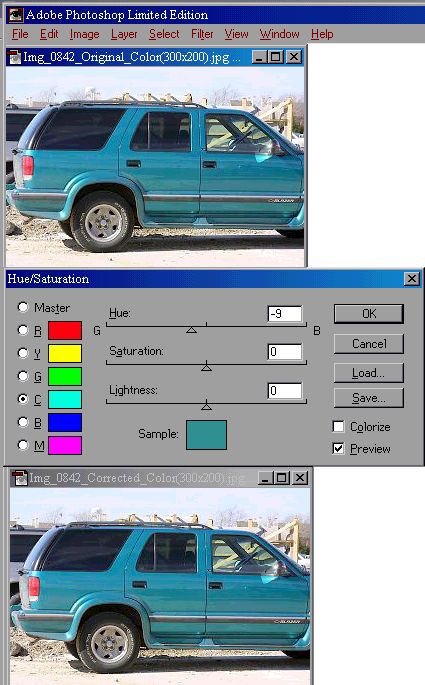
present. Enter
"minus nine" in the Hue
field. That's
it. Now
click on "OK". Watch
the changes... the effect is
immediate. The
false blue disappears and the Teal
color blossoms.
Done. As you
can see, the top picture done with
PhotoShop LE is a near perfect match to
the bottom picture done with the full
version. |


.jpg)
.jpg)
.jpg)
.jpg)