|
|
|
Better
Blue Sky with the Gradient Tool There I
was,
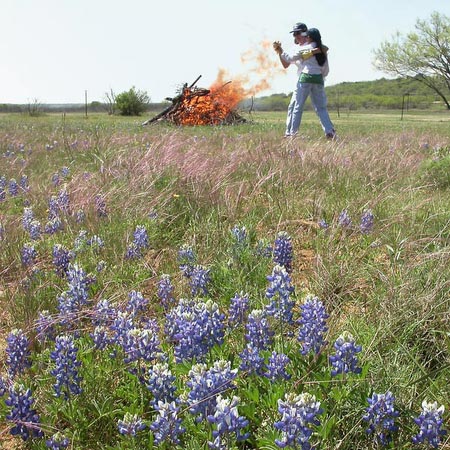
on
my knees at ground level, taking a
closeup of some Texas Bluebonnets while
the girls were working out in the field
clearing brush & burning deadwood.
The boom box was playing in the
background, Willie Nelson & the
boys at their best. I looked up and saw
something special - my wife was
teaching our daughter how to dance the
Texas Two-Step. I tilted the camera up
and squeezed off a snapshot.
I loved
the picture ... I only wished that the
sky looked as blue as it did in real
life. But that's what frequently
happens with outdoor photography. If
the foreground is exposed properly, the
sky becomes faded, gray, or white from
overexposure. Put
the blue back into the sky with a
simple two step process. (Below)
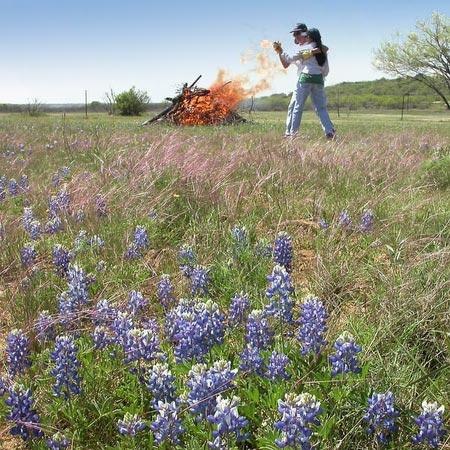
Here's the same picture with a natural
looking blue sky, achieved with a
relatively simple two step process in
Adobe Photoshop. Note that the blue is
darker at the top, fading away as it
reaches ground level, just the way
Mother Nature does it. First
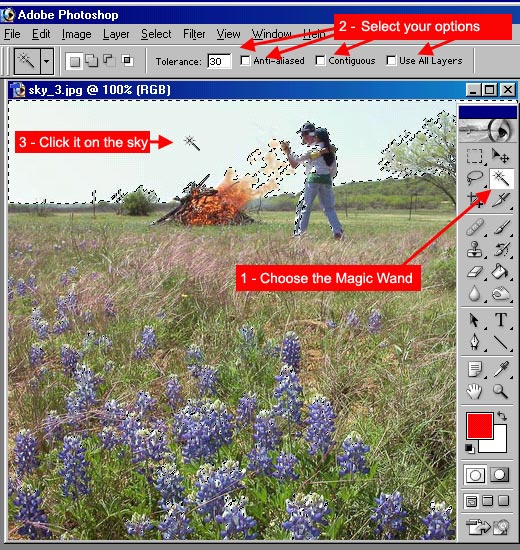
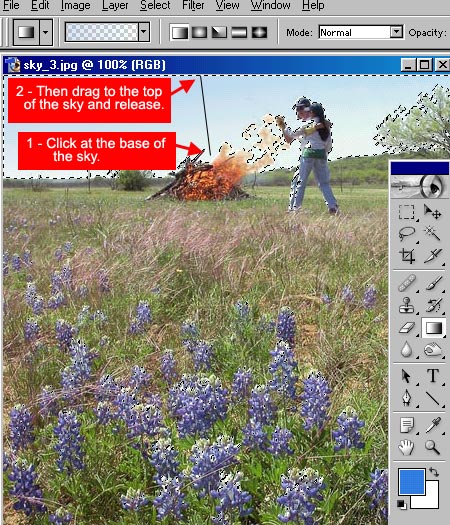
step - The Magic Wand Tool. Second
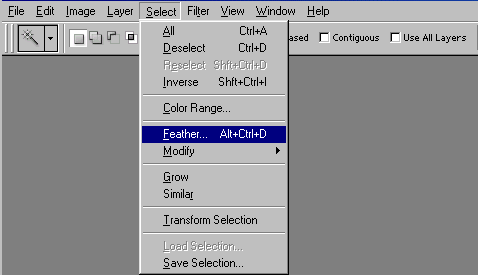
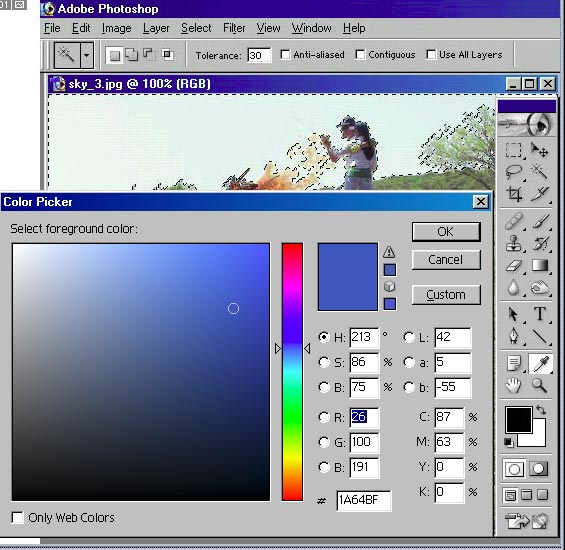
step - The Gradient Tool. Next
pick a natural blue sky-like color to
use for the Gradient. Apply
the Gradient. If
you're printing the picture, try a
stronger opacity percentage of Gradient
fill. A rich blue sky is
especially dramatic in
print. |