|
|
|
I
switched from inkjets to dye-sub
printers in early 1999 and have been
totally satisfied with my prints ever
since. In my opinion, once you've
experienced the appearance, feel,
finish, durability, and quality you get
from a dye-sub printer, you'll never be
satisfied with anything
less. The
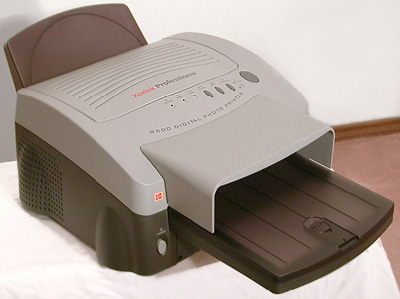
Kodak 8500 brought the price of owning
a full-sized dye-sub printer down to a
level where every pro shooter and
serious digital photography enthusiast
could have one. Printer
Overview How does it
work? The
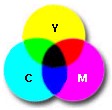
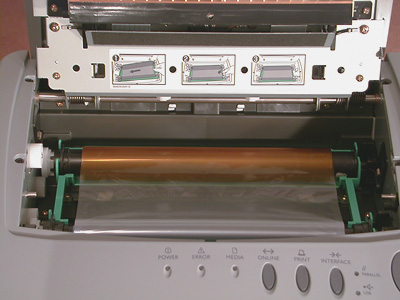
Kodak 8500 printer uses a plastic film
transfer ribbon made up of a continuous
series of transparent yellow, magenta,
cyan, and clear page-sized panels.
The
yellow, magenta, and cyan combination
reproduces natural color by means of
the subtractive
color printing
process. A page-wide
thermal print head, consisting of thousands of
tiny heating elements capable of precise
temperature variations, reacts with the colored
dyes in the ribbon. The heat causes the dye to
vaporize from the ribbon and diffuse onto the
surface of the specially coated paper. The
hotter the heating element, the more dye is
vaporized and the denser the color application.
Precise temperature variations in the tiny
heating elements are responsible for the
variations in color. The printer
automatically cycles the paper through the
printer four times, moving it back & forth
as the thermal print head applies the colors
from the different panels of the moving ribbon
one by one, the fourth pass being a clear UV
resistant protective gloss or matte coating. The
result of the total printing process is a
long-lasting, extremely durable, continuous
tone, true photo-quality color print.
Paper
supply The
paper tray holds 50 sheets of paper.
The
paper comes 100 sheets to a box, each
box contains two 50 sheet
packages. The
printer uses the same paper for matte
or gloss prints, the difference between
gloss & matte output comes from
using two different types of print
ribbons. Paper sizes
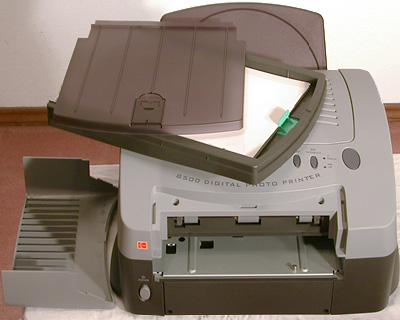
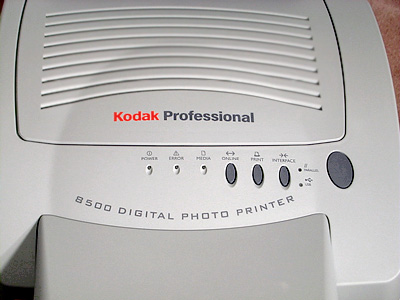
& output Top
control panel & print ribbon
compartment The big
button on the right opens the print
ribbon access cover. The
other three buttons control: Indicator
lights show power on or off, printer
error warning, and paper out
warning. Print
ribbon & carrier A new
ribbon will print 50 pages, the same
capacity as the paper tray. Like
the paper, the ribbons come in 100
print packs, each package contains two
boxes of 50 print ribbons. The
color ribbon is made up of sequential
sections of yellow, magenta, cyan, and
clear. Print
Ribbons If you print
both gloss and matte, you don't need to change
paper, just the print ribbon. In order to print
both gloss and matte finishes, two ribbon
packs are required (one gloss, one matte).
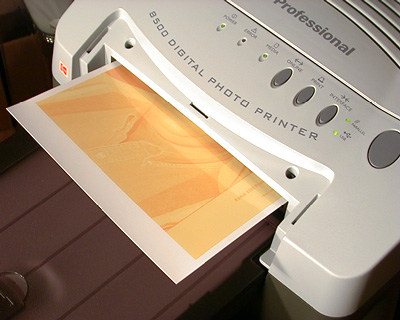
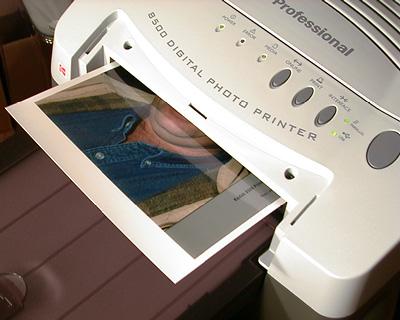
The print
process First
pass Pictured
at left is the first pass through the
printer, shown just as it finished
applying the yellow section of the
print ribbon and began pulling itself
back into the print body to start the
second color pass. Second
pass The
second pass applies the magenta section
of the three color print
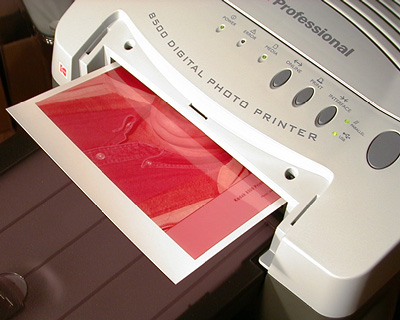
ribbon. Third
pass This
time with the cyan section of the three
color ribbon. The
yellow, magenta, and cyan passes are
combined into a full color, continuous
tone image. The
color application is now
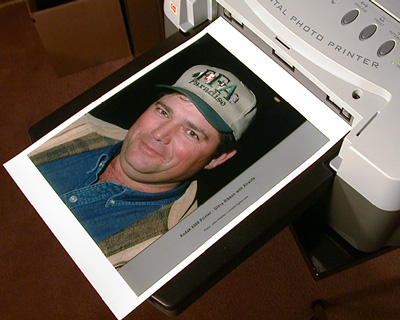
complete. Fourth
& final pass The
fourth pass applies either the gloss or
matte finish UV resistant clearcoat and
ejects the print from the
printer. The
print process is complete. The
print can be handled immediately, there
is no "drying" time. Windows
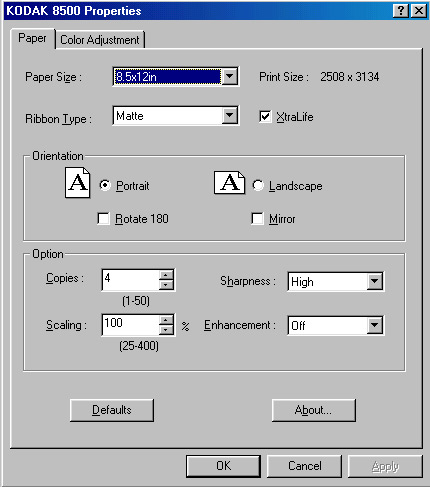
Printer Software Screenshots Print
property adjustments, page
1. In most
cases, I've found that the "High" print
sharpening setting produces the best
quality prints, faithfully reproducing
original on-screen
sharpness. The
"XtraLife" is the fourth pass, which is
the clear gloss or matte finish final
coating. It also serves as a UV light
barrier. Print
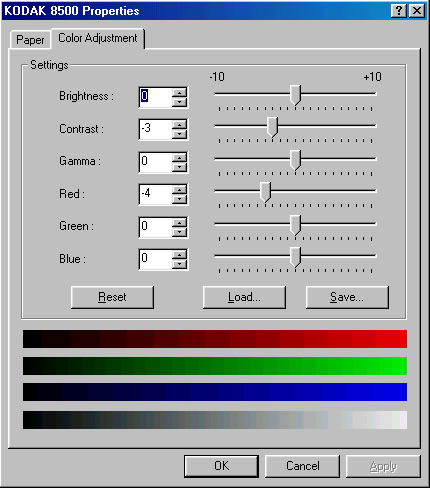
property adjustments, page
2. For my
setup, I found that a small tweak to
the red & contrast settings
produced virtually perfect color and
tone reproduction. |