Lonestardigital Banner

Digital Photography
Opinions, Observations,
Articles, Insights, and Tutorials

 
Perspective Distortion Correction Tutorial

Perspective distortion (also called keystone distortion) is a common problem. It is especially apparent in pictures with dominant vertical lines & shapes. The distortion is caused by the camera's digital sensor (the focal plane) not being parallel to an object's surface and/or not level with the center of the object. If you shoot horizontally and level (perpendicular) with the center of an object, its vertical lines will appear straight. If the camera is tilted up, they will bend inward towards the top of the picture. If the camera is tilted down, they will bend inward towards the bottom of the
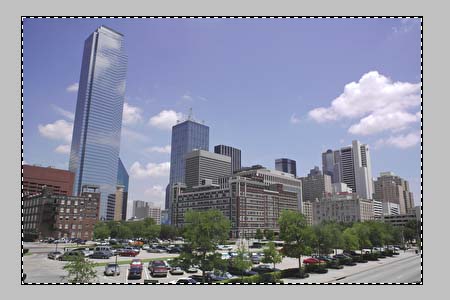
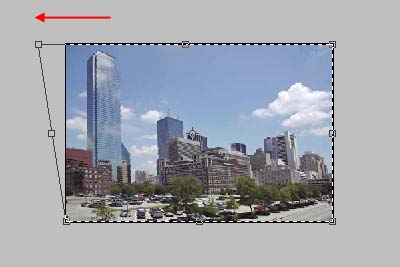
 picture.

Causes of perspective distortion (Keystoning)
Wide angle lenses accentuate perspective distortion because they display a greater range of relative angles within their larger fields of view.

Below: A wide angle scene with a bad case of perspective distortion.

Perspective Distortion ---> Buildings

Typical scenes with perspective distortion problems:

  • Outdoor photography: Slanted trees, telephone poles, fence posts.
  • Architectural photography: Leaning buildings & structures.
  • Indoor photography: Tilted walls, skewed furniture.

Sometimes perspective distortion is unavoidable because of shooting situations or locations, sometimes it's actually desirable for the dramatic
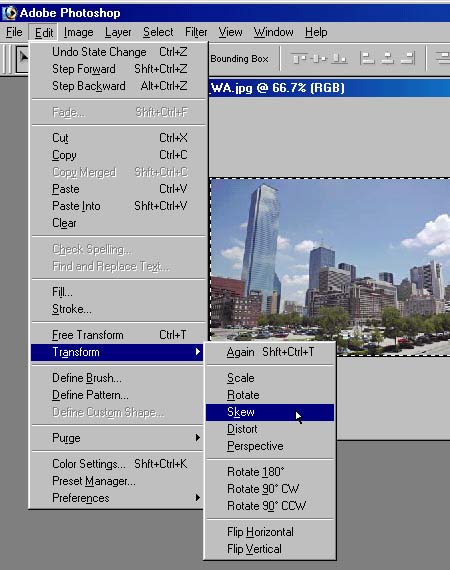
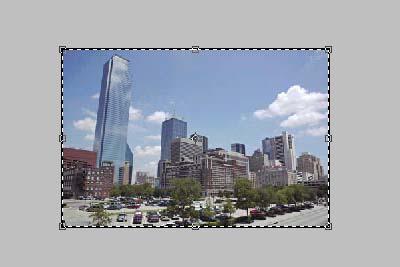
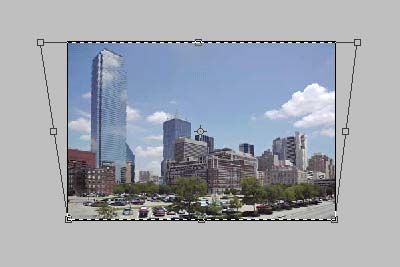
 visual effect.

If you want to correct it, here's an easy way to do it with Adobe Photoshop. The methodology is the same regardless of what version of Photoshop you use. It's fast, it's easy, and it's effective.

  • For this tutorial, please save the above picture to your computer and open it up in Photoshop.

Select All

  • After you open the picture in Photoshop, choose Select / All from Photoshop's menu bar.
  • As shown above, the entire picture will be surrounded by Photoshop's 'marching ants' selection line.


  • Then choose Edit / Transform / Skew.

Edit - Transform - Skew

  • Note: I prefer the Skew tool rather than the Perspective tool because it allows me to adjust each control point individually.

    *The Perspective tool ties two opposite sides of the picture together and should only be used in situations where the perspective distortion is absolutely equal from side to side or from top to bottom (which is rare).


  • Hold the Ctrl key down on your keyboard as you hit the minus (-) key, this will make the picture shrink within the Photoshop desktop & give you room to work around the edges of the picture

Transform Anchor Points


  • There are 8 Anchor Points around the edges of the picture.
  • Move the mouse cursor over the top left Anchor point, click & hold your mouse button down on the point, and drag the Anchor point to the left until the buildings on the left side of the picture are straight.

Stretch to the left


  • Then do the same on the top right Anchor for the right side buildings.

Stretch to the right

  • If you make a mistake, you can hit the Escape key at any time and start over. If you Escape, you simply have to go back to Edit / Transform / Skew and try again.


  • Look over your results and tweak the corrections if necessary. The picture quality might look a bit rough or blocky at this time, this is normal.

Hit the Enter Key


  • When you get it the way you want, hit the Enter key and Photoshop will apply the transformation to the picture. Everything will smooth itself out beautifully.

Finished Picture

  • Done.

Once you're comfortable with the Skew tool, play around with the other Transform tools ... I think you'll find them to be useful in more ways than you can imagine! If you feel you need more guidance or would like to learn more, search for schools for photography where you can get additional knowledge.