|
|
|
Certain lighting
conditions can give skin tones a harsh,
unnatural look. Flash lighting is the most
common cause, followed by late afternoon direct
sunlight. The result is often an uncomfortably
strong orange, yellow, magenta, or red look to
skin in an otherwise well balanced, natural
looking picture. Some cameras are bigger
offenders than others. (The more saturated the
camera's color output, the worse the
effect.) Software
required: Adobe Photoshop At
left: Original Nikon 880
indoor fill flash photo. This
particular shot was the most
intense example I've ever
encountered. Orange
skin tones, looking much like
heavy pancake makeup, ruin the
picture. After
correction, the skin tones are
back to normal. The
rest of the picture's colors
are unaffected by the
procedure.
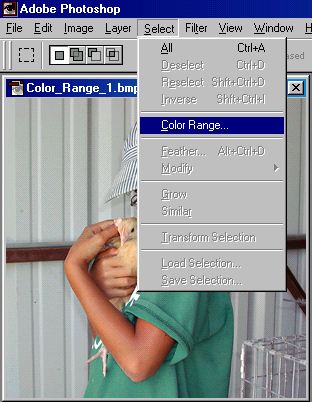
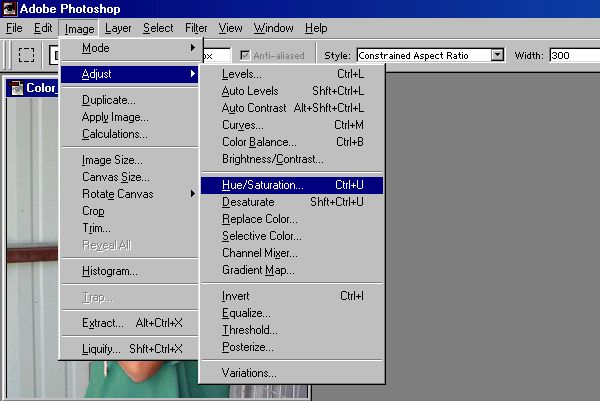
Step by step
process - First,
select "Color Range" in the
drop-down menu bar, as
shown.
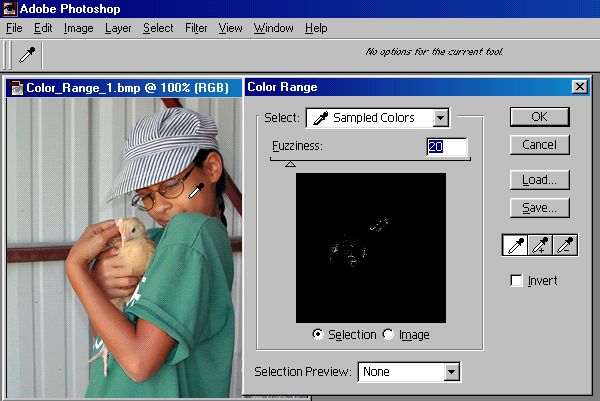
The
mouse cursor changes into an
"eyedropper" as your sampling tool to
target the offending color areas.
Setting
the fuzziness to around 20 seems to
work the best for most pictures.
The
fuzzy factor expands the color target
so that you won't have to click on so
many areas to get all the skin tone
variations. On the other hand, too big
of a fuzzy factor will pull in some
colored areas that you don't
want.
Click
on the middle eyedropper box (the one
with the + sign, as shown below) to
make it additive, so that every time
you click on a different area of the
skin coloration, it adds to (expands)
the selection. Click
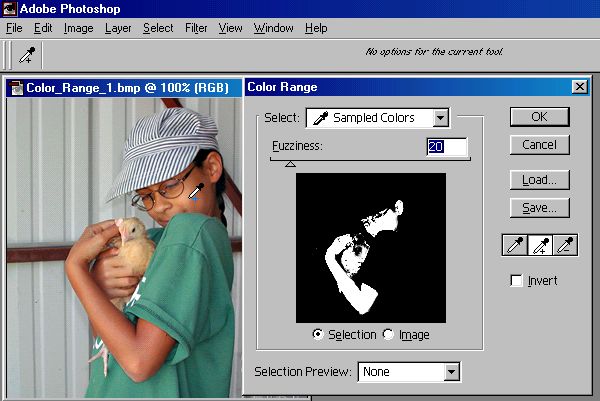
"all over the place" on the skin. Arms,
face, hands, ears... until virtually
all the skin colored areas light up in
the color range box, as shown below.
Sometimes it takes just a few clicks to
get it, sometimes it takes a lot
of clicking around before you get it
all. This
procedure targets only the offending
color ranges, and leaves the rest of
the picture alone.
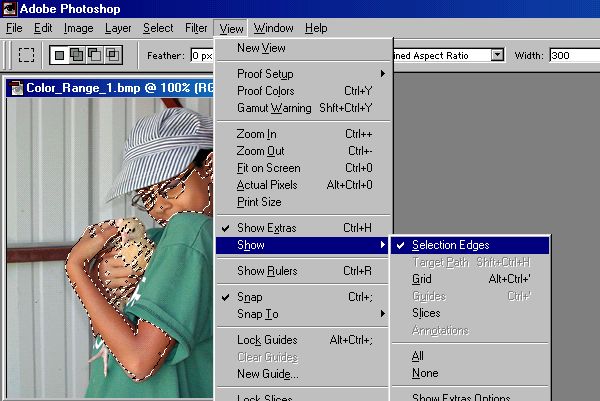
Once
you have this completed, click on OK,
and the "marching ants" outlines of the
selected areas show up on the picture
(as shown below). Then
it's best to uncheck the Selection
Edges line to make the distracting
outlines disappear. (Shortcut keystroke
Control-H does the same
thing.) Now
you're ready to dial the skin color
in.
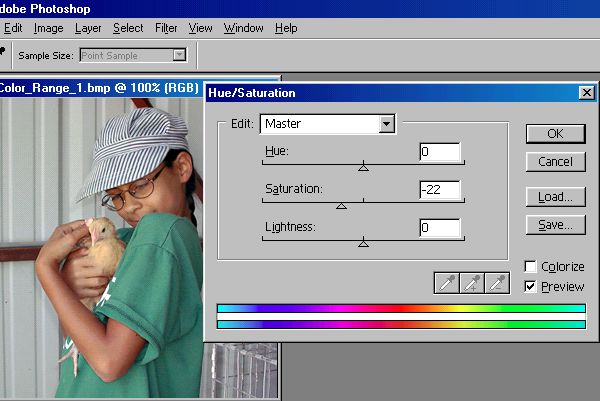
Go to
the Hue/Saturation adjustment selection
in the drop-down menu bar. Selective
saturation reduction is the key to
correcting the problem.
Decrease
the saturation as necessary to achieve
the desired look. This picture looked
best at -22, most pictures require much
less of a reduction. (-8 through -15
are typically used values.) Notice
how the "Orangeness" goes
away.
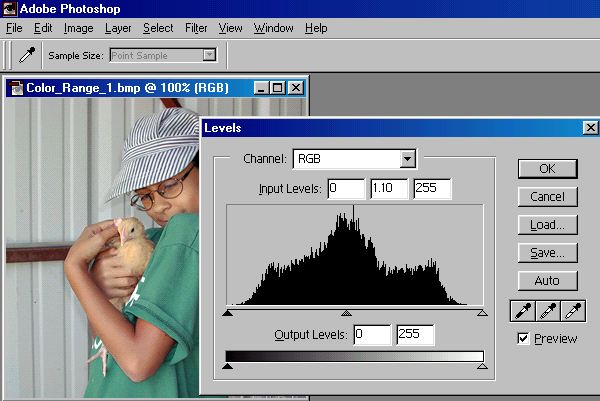
Other
minor adjustments might be necessary to
get the final accuracy you're looking
for. On this
picture, I found that a slight Levels
midtone adjustment to 1.10 (as shown)
lightened the skin color just right,
and nothing else was necessary.
On
other pictures, I sometimes make some
minor selective color adjustments to
slightly reduce magenta, yellow, or
cyan if it appears as a problem
cast.
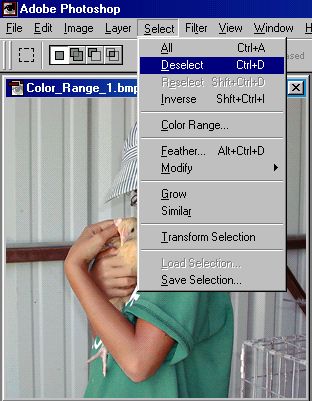
Finally,
click on "Deselect" to return
the picture to a normal
state. Save
your corrected picture under a
modified file name so the
original picture stays
"original".
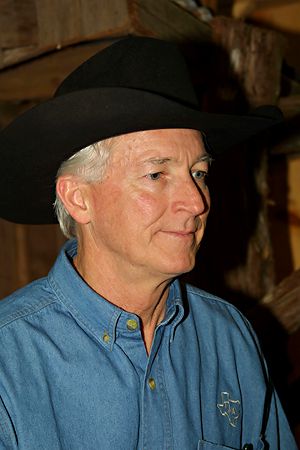
Here's
another example, before and after
saturation (only) correction.
For
this Canon D30 flash picture, I reduced
the skin tone saturation by 15%.
It
helps to remember what your subject
looked like... the original picture
looked pretty good, but in the real
world, this cowboy was pretty much of a
paleface. |