|
|
|
Using
Unsharp Mask with Photoshop's Fade
Command Fast, Simple, and
Accurate The Fade command
is a simple way to adjust the strength of any
Photoshop filter, painting tool, erasing tool,
or color adjustment setting after the
fact. The Fade command is especially useful for
quick, easy, and precise sharpening. Sharpening is an
art in itself, with many methods being touted as
the 'best'. But sharpening techniques can be
difficult to learn, hard to understand,
cumbersome, and time consuming. And when you
finally have a picture sharpened 'just right',
it's a challenge to do it again when you need to
sharpen another picture. The
Unsharp Mask / Fade technique shown
below can be used on any picture that
needs sharpening. It doesn't matter if
the picture needs a lot of sharpening
or just a little tweak. And you set it
up the same way every time. It's fast,
it's easy, & it does a great job.
Once you learn how to use it, you'll
love its speed, simplicity, and
accuracy. Below:
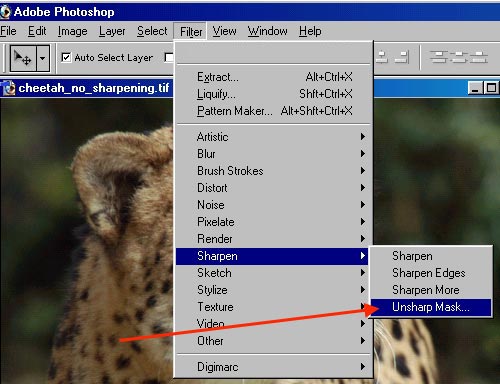
Original picture (soft, needs
sharpening). From
the Photoshop menu bar, select
Filter > Sharpen > Unsharp
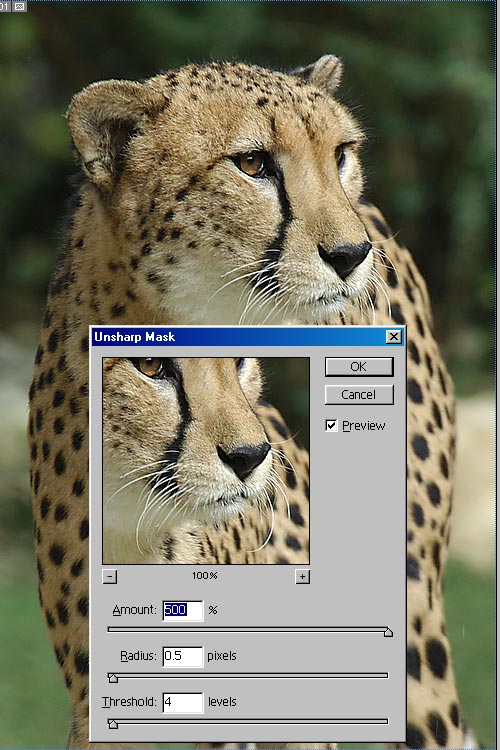
Mask... Set the
Amount at 500% (the maximum setting),
Radius 0.5, Threshold 4. Check
the Preview box. Click
on OK. Go on
the program's top menu bar and select
View > Actual Pixels. The
image size displayed on your screen
will then be full sized (100%).
(Note:
Pictures should be displayed at 100%
size for an accurate sharpening display
with any sharpening technique.) The
picture should look
oversharpened at this time, but that's
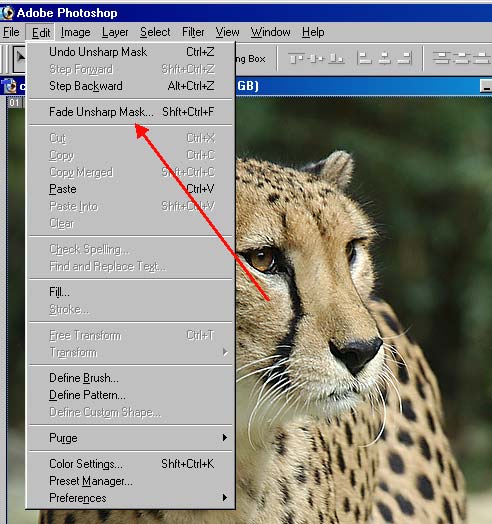
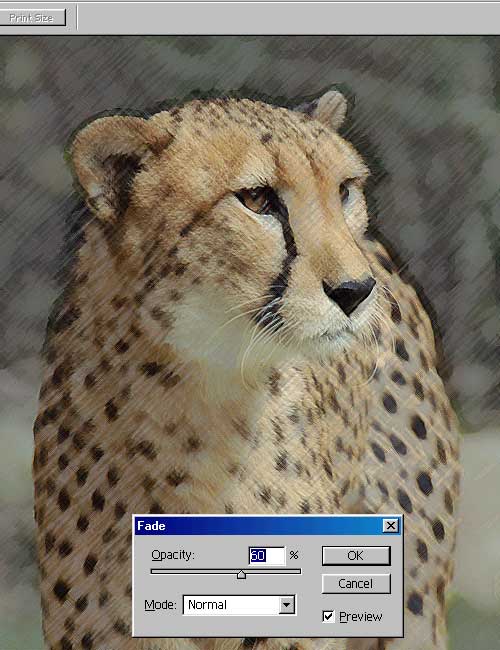
what you want for now. Next
select Edit > Fade
The
Fade Command will refer to whichever
filter was just applied, in this case
it says "Fade Unsharp
Mask..." For
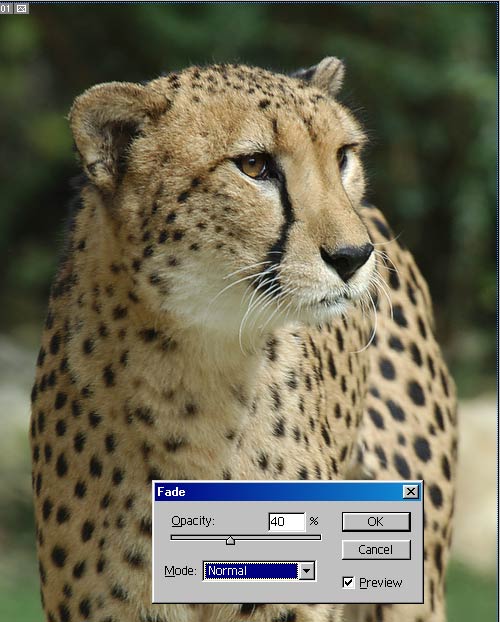
Mode, choose Normal. Check
the Preview option to watch the
sharpening adjustment in real
time. Now
move the opacity slider with your mouse
pointer to adjust the strength of the
sharpening between 100% (maximum
sharpening) and 0% (zero sharpening).
Tip: If
you click the mouse pointer in the
number box and hold the Shift Key down
on your keyboard as you turn the mouse
wheel, the strength settings will jump
10% at a time. (Link
to the Wheel Mouse Tip) Click
on OK when you like what you see...
It's like focusing a camera lens -
you "focus" the sharpening until the
picture looks just right.
Opacity
percentage adjustments will vary from
picture to picture depending on how
much sharpening the specific picture
needs. For this picture, 40% was my
final choice. That's
all there is to it - you're done.
The Fade
Command isn't just for sharpening You can also use
the Fade Command on any other Photoshop filter,
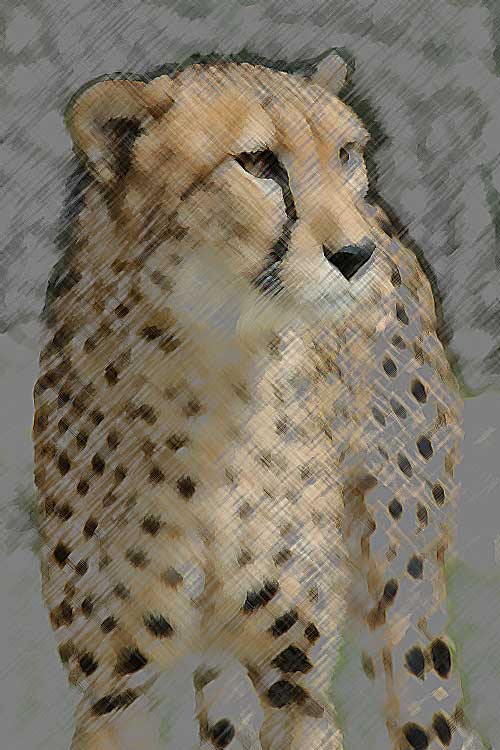
painting tool, or color Here's
the Fade Command used with a Photoshop
filter called the "Colored Pencil".
Below:
Default Colored Pencil filter settings
applied. (Too harsh for my
liking.) Rather
than try different settings that I
wasn't familiar with, I simply opened
the Fade Command and dialed it down to
60%. (Below)
That's more like it... Nice! Important
Note The Fade Command
is available only as the next step after a
filter, tool, or adjustment is applied.
Otherwise it will be grayed out (not available).
|