|
|
|
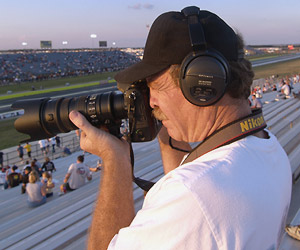
Nikon
D2H Some
consider the D2H to be the
best all-around Digital SLR
ever made because of its
outstanding build quality
& professional class
features. Others consider it
underpowered because of its
relatively small 4.1 megapixel
sensor. I
think both viewpoints are
good reasons to like the
D2H. Underpowered?
Not necessarily .... the 4.1 megapixel
sensor actually could be considered to
be a strong point because of its
smaller, easier to manage image file
sizes. Practically speaking, the
smaller file sizes are faster &
easier to work with. The D2H's 4.1
megapixel sensor produces uncompressed
Raw format files averaging 6 megabytes,
compressed Raw format files in the
mid-3 megabyte range, and three quality
settings of large or medium sized
Jpegs. All with significantly smaller
file sizes than their 5, 6, and 8
megapixel camera counterparts. Smaller
files mean more pictures on a memory
card, more storage on a computer hard
drive, and faster archiving to CD-ROM
or DVD. The smaller files also mean
faster transfers from memory cards and
faster file-open times in image
processing software. The
practical factor wouldn't mean anything
to me if the picture quality suffered,
but it doesn't. For web use and for
prints up to 12 x 18, I find the D2H's
picture quality equal or better than
any other camera on the
market. Favorite
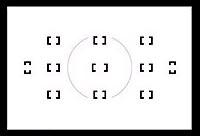
features & options The
advanced 11 area AF system
with 9 horizontal /
vertical cross type AF
sensors & 2 outer
vertical sensors equals
quick response and sharp
focusing under all kinds of
shooting
conditions. Sample
pictures
No
Turning
Back
Queen
of the
Hill
While
I was sleeping
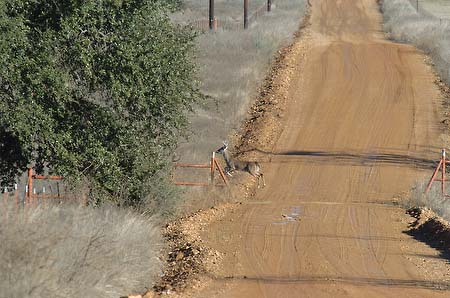
Deer
Crossing
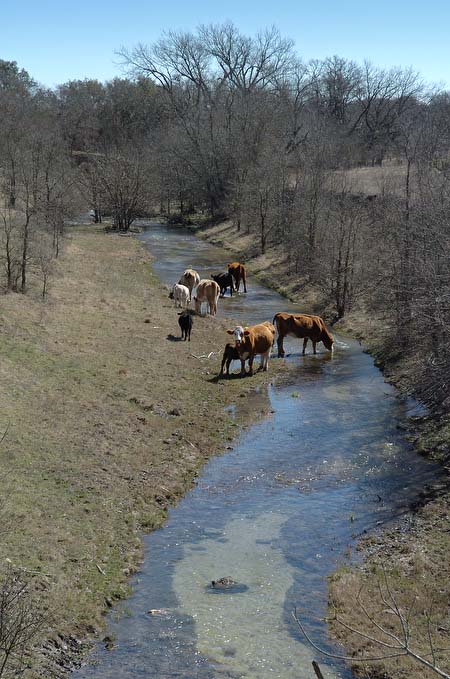
Cows
in the
Creek
Recommended
Nikon D2H setup, software, and
workflow My Preferred
Camera Settings Image
Quality Combination
Raw (NEF) plus large (L) sized fine
quality jpegs. Large/Fine
Jpegs shot with Normal Sharpening and
Low Tone are easy to post process. I
run them through Photoshop with my
simple Midtone Layer Sharpening Action
and love the results. The NEF
files are digital 'negatives', critical
core corrections and adjustments to
white balance, exposure, sharpening,
tone, color space, and much more can
easily be done after the fact on your
computer using compatible Raw software
such as Adobe Photoshop, Nikon Capture
4, and others. If my Jpegs are 'off', I
correct the corresponding NEF files in
Nikon Capture 4 and save them as high
quality Jpegs within Capture 4 to
overwrite the original Jpeg
pictures. Raw
Compression On one
hand, many feel that the disk &
memory card space saving attributes of
using compressed files outweigh the
slight highlight clipping &
ever-so-slight loss of quality that
occasionally occurs. Compressed NEFs
take up only about half the space of
uncompressed NEFs and (unlike earlier
Nikon DSLRs) write to the D2H's memory
card with blazing fast
speeds. On the
other hand, others feel that you
probably need all the help you can get
to ensure the best possible picture
quality because you're only shooting
with a 4.1 Megapixel sensor. The
bottom line: If disk
& memory card space is a problem,
choose ON. If maximum quality is your
goal, choose OFF. White
Balance Auto
+1. The +1 setting cools off the
slightly warm (brownish-yellow) look
and makes everything look
fresher. Image
Sharpening Normal.
Normal in-camera sharpening corrects
the basic blurring/softening effect of
the camera's combination LBCAST
low-pass filter & cover glass
without oversharpening the picture.
Normal sharpening produces a clean but
slightly soft picture. For keeper
pictures I then add my Photoshop
Midtone Layer Sharpening Action to the
picture to produce sharp / top quality
pictures. Tone
Compensation (Contrast) Low.
Low produces maximum highlight &
shadow details. Increase the tone
(contrast) after viewing the picture if
you really think you need to ... I
rarely do. Color
Space I
(sRGB). Hue +3.
Eliminates the slight magenta or red
cast and gives more natural skin
tones. Exposure
Compensation None. LCD
Brightness -1. The
standard brightness setting is too
bright, giving an inaccurate visual
rendition of exposure on the camera's
LCD screen. I like mine set on -1, I
think it gives the best preview of the
true exposure. Custom
Setting b1 Auto
ISO 'On". On.
Auto
ISO will not work effectively in
Programmed Auto Exposure or Aperture
Priority shooting. It is designed to be
used for Shutter Priority or Manual
Exposure modes. Here's
how Auto ISO works: Note:
Auto ISO does not work in High 1 (ISO
3200) or High 2 (ISO 6400)
settings. Auto
ISO is WONDERFUL for sports &
wildlife shooting where shutter speed
is critical. Example - set your ISO at
200, set Shutter Priority at 1/250th,
and the camera will hold the 1/250th
shutter speed constant in varying
lighting conditions by first regulating
the Aperture (as is the case anytime
you shoot Shutter Priority), then by
adjusting the ISO to a higher setting
if there's not enough light. Custom
Setting d1 Set
Continuous Low Speed Shutter @ 4 fps. A
good choice as an option to compliment
the Continuous High Speed setting of 8
fps. Custom
Setting d5 File
Number Sequence "On". Acts as an
odometer for the total number of
pictures you've taken with your camera
and prevents the possibility of
overwriting an existing picture in your
computer files that might have the same
file number. Custom
Setting e1 Flash
Synch Speed 1/250 (FP auto). This
setting will enable Nikon SB-800AF
Speedlight to synch all the way up to
the D2H's maximum 1/8000 shutter
speed. Custom
Setting f 5 (Command
Dials) - I love this one. Once
you're inside Custom Setting f 5, go to
"Menus & Playback" and choose "On".
This enables menu selections and image
playback to the Command and Sub Command
dials in addition to the
Multi-Selector rocker switch. Using the
Command & Sub Command dials is
especially fast & easy while
scrolling through the pictures you've
taken. Now you can just roll the main
Command Dial to scroll through the
pictures, and roll the Sub Command Dial
to view the histogram, highlights,
& shooting data. Recommended
Software Nikon Capture
(version 4 or newer), Adobe Photoshop, and
ThumbsPlus
or equivalent cataloging software are the best
software investments you can make if you're
serious about getting top quality pictures from
any Nikon Digital SLR, including the D2H. I've
tried & used them all, in my opinion these
are the best way to go. Don't bother with
Nikon's free Nikon View or Nikon PictureProject
software packages, they're slow, cumbersome, and
frustrating. Jpeg Preview
Workflow I recommend
creating a separate folder to park the in-camera
Jpegs in. The Jpegs are perfect for fast
on-screen previews & slide shows on your
computer. Review the Jpegs to choose the keepers
from the culls. I like to run a slide show for a
few continuous loops to get the feel for what I
like & don't like. Use the Jpeg folder as a
working album to easily find & reference the
NEFs you want to use if you need to do some Raw
post-processing. Skin
Tone Issues? Other
photographers find little or no problem at all,
perhaps because of their particular shooting
styles or techniques. It may be that they rarely
rely on flash to light up their pictures.
(Available light pictures seldom show a
problem.) And perhaps they're viewing their
pictures on bright, sharp, clear CRT monitors.
Read
more here ... Lens
Release Button Warning !! Be careful with
the D2H's BIG lens release button. Many
(including me) have experienced accidental lens
loosening or catastrophic lens releases while
shooting in the field. Sometimes, when you least
expect it, you'll accidentally nudge the
camera's lens release button and your lens will
slowly and unexpectedly loosen, possibly even
fall off the camera. (!!!) Be sure to check
your lens from time to time to be certain it's
securely locked to the camera body. |

.jpg)
.jpg)
.jpg)
.jpg)
.jpg)
 Some
photographers have problems with the D2H's skin
tones, which can show strong, sometimes almost
mottled-looking orange, yellow, red, and pink
overtones. Flash pictures usually intensify the
effect.
Some
photographers have problems with the D2H's skin
tones, which can show strong, sometimes almost
mottled-looking orange, yellow, red, and pink
overtones. Flash pictures usually intensify the
effect.