|
|
|
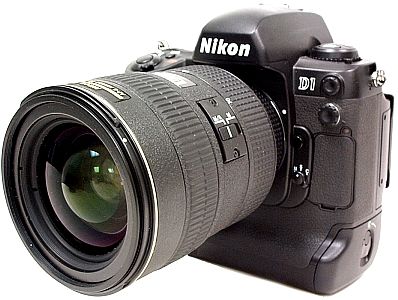
Nikon
D1, D1H, and D1X Review I
bought my first D1 body in November,
1999. I had been shooting with a Kodak
DCS 620, but made the switch to the D1
because of its lighter weight and
better 'feel' in my hands. I also liked
the D1's LCD review screen a lot
better. Because
of the cumbersome qualities of the
original Nikon D1 Raw (NEF) processing
software and the slow, bulky nature of
shooting in-camera Tiff files, I chose
to shoot Jpeg 'fine' quality during the
entire time I owned my original D1. I
used the same camera setup options most
of the time: These were close
to the default settings from the factory, with a
few minor changes. I left it like that so I
could just pick it up, turn it on, point, and
shoot. Keeping it simple allowed me to
quickly capture a scene without having to make
"camera decisions". I reserved using High ISO,
Manual Exposure, Aperture Priority, and Shutter
Priority for special circumstances. The
only serious complaint I had about the D1 was
its color accuracy.
The physical and operational quality of the
camera was outstanding, but the color was
consistently a bit "off". Magenta skin tones,
cyan casts, sallow tones, and weak looking reds
were (and still are) a nagging problem for the
original model D1 users. The NTSC color profile
that the D1 uses makes the problem an inherent
characteristic. There are no internal
adjustments for the problem, no firmware
updates, and nothing the D1 user can do except
for post-processing computer work. After weeks of
experimenting in Adobe Photoshop, I came up with
a simple, reliable fix for the color problem.
Once I figured it out, I used my quick &
easy fix for every D1 picture I ever took
(including the sample pictures shown below.)
Click
here to see the Lonestardigital D1 color
fix.
It
really works! ... and sincere thanks to all the
readers who've e-mailed me thank-you notes for
the fix. D1
Sample Pictures Telephoto Taken
on a trip to Huntington Beach Pier,
California - hand held Nikon D1
Telephoto shot using Sigma's 50-500mm
Zoom Lens @ 500mm. Aperture Priority @
f8, ISO 400,Shutter Speed: 1/800,
Matrix Metering, Jpeg 'Fine' Original
Format. Click
on the preview at left for a 451 KB,
1200 x 787 pixel view. Wide Angle
Lens Vintage WW II
Heinkel Sigma
EX f2.8-4 17-35mm zoom lens @ 17mm.
Jpeg 'Fine' Original Format. Click
on the preview at left for a 283 KB,
1200x787 pixel view. Night
Shot Downtown Dallas
along Nikkor
AF-S f2.8 28-70mm zoom lens @ 40mm.
Jpeg 'Fine' Original Format. 2
second Programmed Automatic
Exposure. Click
on the preview at left for a 455 KB,
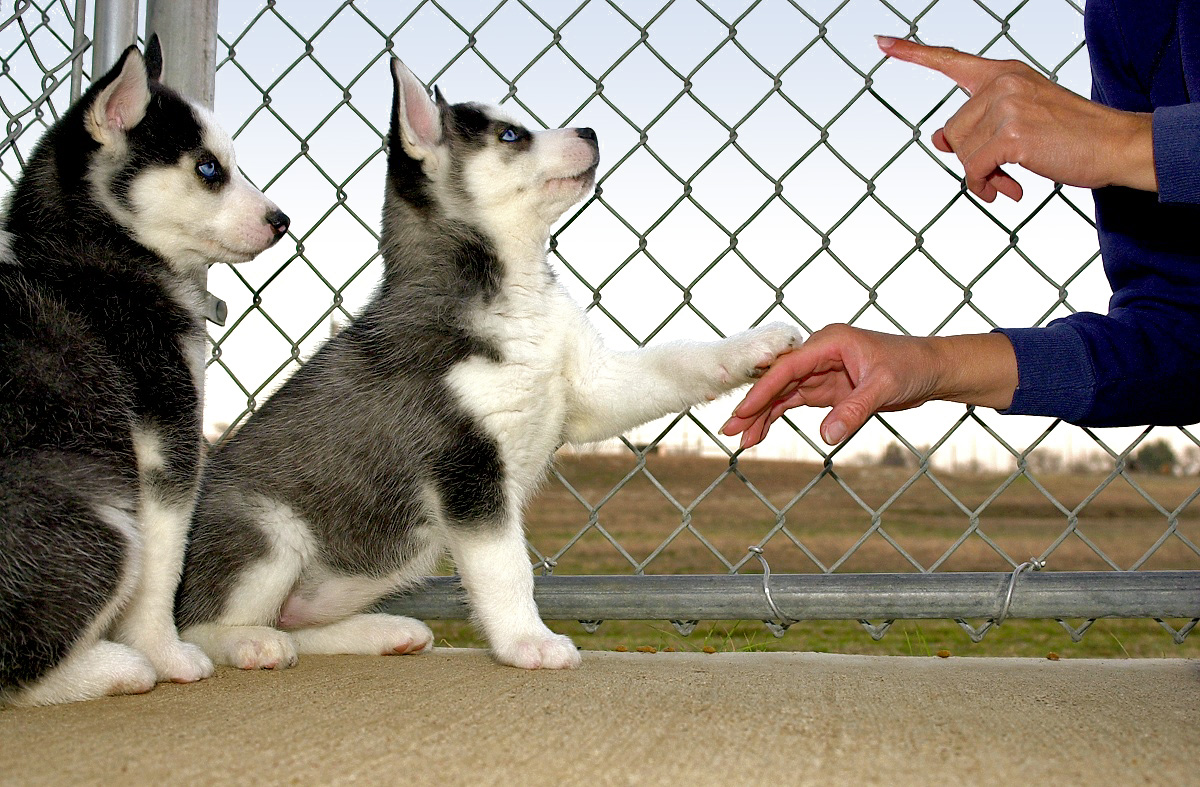
1200x787 pixel view. Daylight Fill
Flash Nikon SB28-DX Nikkor
AF-S f2.8 28-70mm zoom lens @ 28mm.
Jpeg 'Fine' Original Format. Click
on the preview at left for a 420 KB,
1200x787 pixel view. D1
features Included
with the Camera Set Included with
the camera (USA camera package): NTSC video out
cable (EG-D1), body cap to fit lens opening in
camera body (BF-1A), snap-on opaque black LCD
monitor cover , neck strap (AN-D1), one battery
(EN-4), quick charger (MH-16), Nikon View
DX browser software with user manual on a
CD, Nikon D1 user manual - printed and on a
CD. D1
Accessories AC adapter
(EH-4), extra batteries (EN-4), DX series
speedlights, ten-pin remote terminal cords and
control sets, Nikon Capture software
(required to process the proprietary Nikon RAW
image files), optional focusing screens, and
viewfinder eyepiece accessories. Custom
Settings The D1 has 32
custom setting options available to modify
certain operating functions. They may be changed
singly or in combination to suit user
preferences. Some users prefer to make no
changes, some make minor changes, others modify
the settings heavily - (the tinkering
types). I found the
following four custom settings to be very useful
for everyday operation, and left my camera
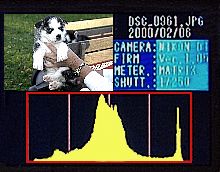
permanently set up with them: An
experienced digital photographer can look at
a preview picture, then look at its
histogram, and make an informed analysis of
the exposure. Corrections to EV (+ or -) can
then be made in the camera controls, and the
histogram rechecked in a follow up
shot. I left my
custom setting number at "27" on the lower
control screen, and by simply holding the
"CSM" (custom) button down while turning the
camera's sub-command dial (the one on
the front), I could easily switch back and
forth between option 0 (full screen picture)
and option 1 (histogram plus picture). It
only takes a couple of seconds to do the
switching. I sold my
D1 after 6 months and jumped ship to Canon (for
a while) I sold my
original D1 because the ever present color
correction was just too much of a hassle. With
no fix from Nikon and no new Nikon digital SLR
in sight in the near future, I bought a Canon
D30. The D30 was a big color improvement over
the D1, but the
D30 had some color problems of its
own.
Yes, the D30 took some great pictures for me,
but the bottom line was that I just liked the
feel of the D1 better. So I sold the D30 and
bought a D1H as soon as it hit the
market. The D1H
seemed like a dream come true Nikon fixed its
color problems with the D1H. (Completely.)
I loved my D1H
... perfect color, 5 frames per second, a bigger
buffer, and Nikon's vastly improved Capture 2
software made shooting "Raw" an absolute
pleasure. Capture 2 made it a breeze to dial in
virtually perfect white balance and virtually
perfect exposure after the fact, so there was no
more need for bracketing or time-consuming
pre-shooting camera calibrations. It reminded me
of supply
chain management
software,
which made my life so much easier. And this
camera did well with high ISO / low light action
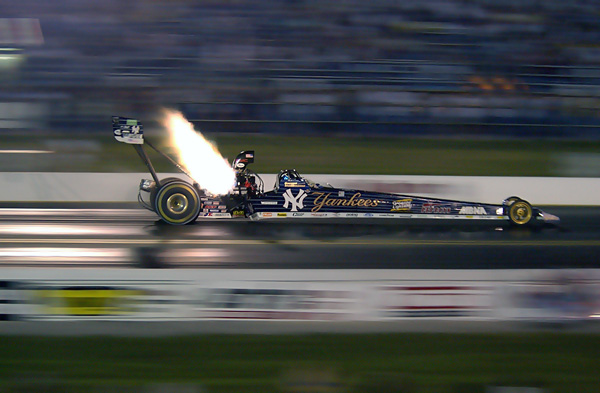
shots. Most consider the D1H to be the camera
the original D1 should have been in the first
place. Below: D1H ISO
1600 nighttime drag racing photo.
Click
to enlarge, 1200 x 787 pixels, 332
KB The D1H retained
the original D1's 2.7 megapixel resolution,
which meant limited cropping ability if I wanted
to make a large print. (You can only stretch a
reduced pixel count so far without significantly
degrading the picture quality.) And at that
point in my life, I was doing a lot of
printing. Seeking
better large print quality, the D1X came
next After seeing
some outstanding quality BIG prints from the
D1X, I sold my D1H & bought a D1X. The extra
resolution (double the D1 / D1H) not only made
better quality large prints and gave me the
ability to aggressively crop while retaining
reasonably good large print quality, it made
better quality standard sized (4x6) prints as
well. The D1X had the same (virtually perfect)
color qualities as the D1H. Unfortunately,
the D1X had one full stop less of high ISO
shooting ability and the bottom fell out of the
buffer and the high frames-per-second shooting
rate, but I loved the big file sizes and
increased detail in my large prints. I also found
that the "A" setting on my SB-28DX speedlight
produced better quality flash pictures with the
D1X (and the D1H) than the generally recommended
D-TTL setting. Below: D1X Flash
Photo, SB-28DX Speedlight set on "A" -
Click
to enlarge, 1000 x 1500 pixels, 635
KB D1, D1H
& D1X battery comments |

.jpg)
.jpg)
.jpg)
.jpg)